Motivation
- Making meaningful use of old, unused hardware or upcycling it
- Software development in conjunction with hardware
- Engaging in electronics and soldering once again
- Creating something useful, amusing, and unconventional with technology
- Creating a reference guide for myself and others who have similar projects in mind
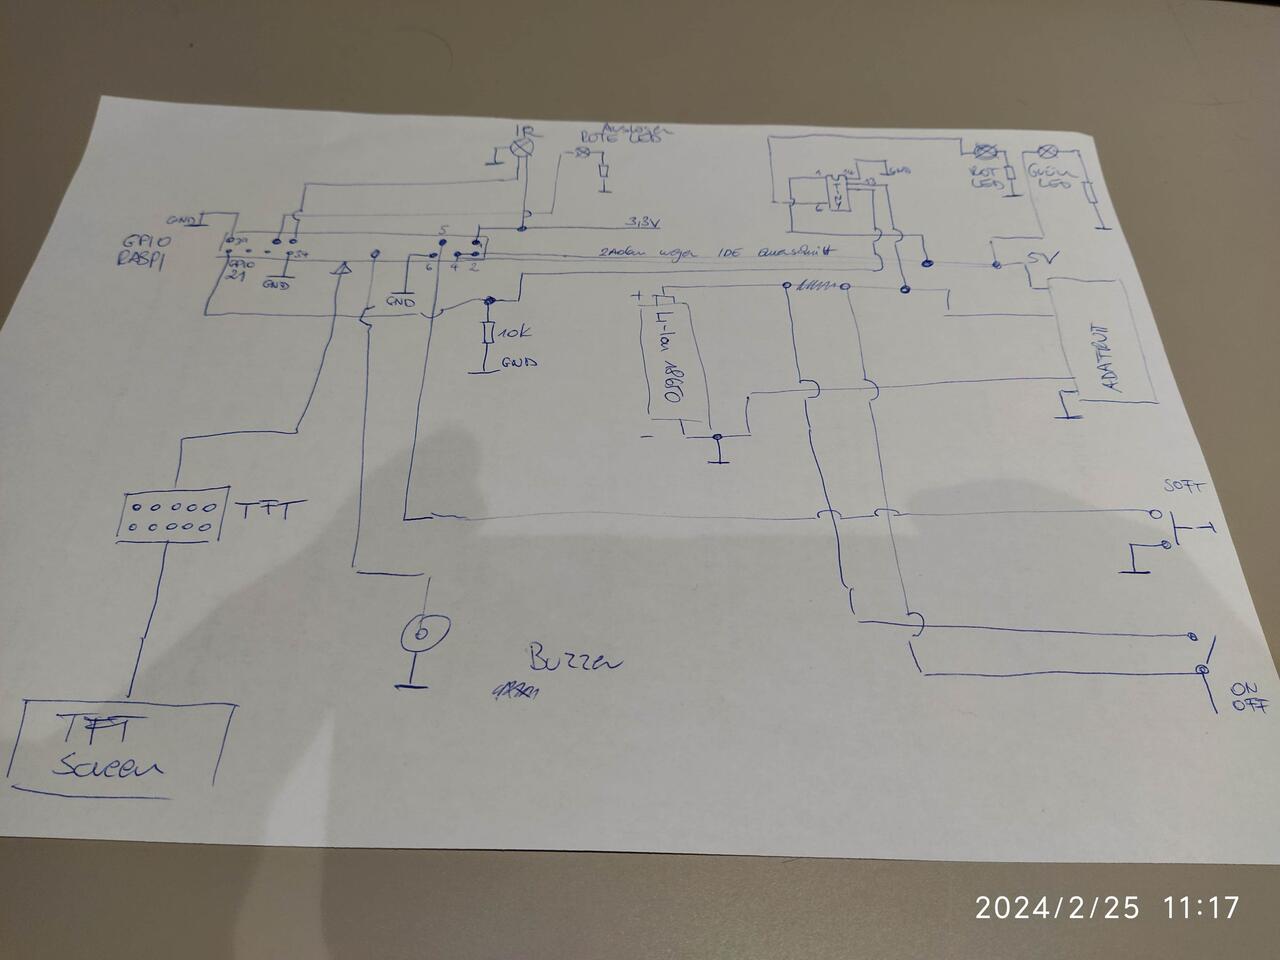
Project-Features
- Preview display via a TFT, similar to a typical digital camera
- Text messages can be displayed in the preview.
- Captures images in 1920x1080 resolution.
- Prints images instantly after capture via a point-of-sale receipt printer.
- Printed images are assigned a QR code.
- Images are uploaded to a web server and can be downloaded via the QR code.
- Runs on the go via a Li-Ion cell with a step-up converter and has approximately 2 hours of mobile runtime.
- Li-Ion cell can be recharged via a micro-USB.
- Capture activation is indicated next to the camera with a red LED and by an buzzer sound.
- Can be controlled via a small IR remote control -> Capture activation, disable printing, exit camera program.
- There is a soft power-off button which shuts down the Raspberry Pi.
- There is a power-off switch to disconnect the battery from everything.
- an atmel84a measures the li-ion cell voltage and it turns red LED on if the voltage goes under 3,5V
- if the li-ion cell ist connected to the step-up converter a green LED is burning
Assembly
The following sequence was followed during development:
- Procure hardware
- First, set up an OS (Operating System)
- Ensure headless (=SSH) operation
- Configure WLAN
- Install buttons for shutdown and photo capture
- Configure thermal receipt printer via CUPS
- Set up TFT display via SPI
- Connect and test red LED
- Connect and configure IR sensor, and test
- Write Python code
- Configure web upload and web server
- Test and install Step-Up + charging electronics
- Customize casing and assemble hardware
- More test caused by undervoltage tests