Required Components
- Raspberry Pi (I've tried B, B+v1.2, Raspi2, and Raspi3B+, and settled on Raspi2)
- SD card
- USB stick
- Camera module
- Thermoprinter (i have used GPT-4352-LV-88-USB)
- 2x red LED, 1x green LED
- IR sensor
- Mechanical switch
- 2x Push buttons
- 1x Li-Ion 18650 cell
- Step-Up circuit
- Charging circuit for Li-Ion cell
Raspberry Pi
- Raspberry Pi boards revision list
- Using
pinoutin the command line, you can output the Pi's data, especially displaying the GPIO designations. - Raspberry Pi Wiki
GPIO Wiring
          3,3V - 01    02 - Raspi VCC 5V
                 03    04 - Raspi VCC 5V
 shutdown BUTT - 03    06 - GND
                 07    08 - shutterBUTTON
           GND - 09    10
    shutterLED - 11    12
                 13    14 - GND
                 15    16 - TFT LED
                 17    18 - TFT DC
      TFT MOSI - 19    20 - GND
                 21    22 - TFT Reset
       TFT SCK - 23    24 - TFT CE0
           GND - 25    26
                 27    28
                 29    30 - GND
                 31    32 - Buzzer VCC/HIGH
                 33    34 - GND
                 35    36
                 37    38 - IR-sensor signal
           GND - 39    49 - HIGH LVL for atmel84a
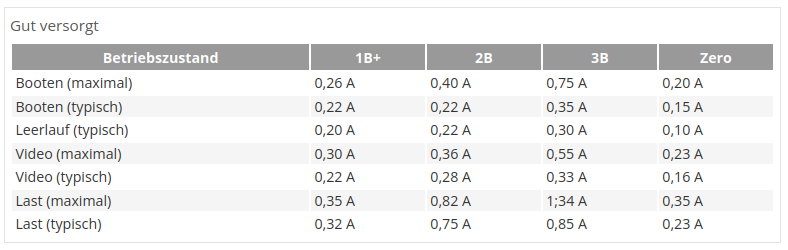
Power Consumption Tables

Timing Measurements
- Raspberry Pi B: Boot time 1:46, print time approx. 9 seconds (using 4GB SD card)
- Raspberry Pi B+ v1.2: Boot time 2:00, print time approx. 10 seconds (same 32GB micro SD card)
- Raspberry Pi 2B: Boot time 0:53, print time approx. 1 second (same 32GB micro SD card)
- Raspberry Pi 3B+: Boot time 0:25, print time approx. 1 second (same 32GB micro SD card)
SD Card
As for the SD card, I have installed a 32GB version, but to ensure ample space for all necessities, at least a 4GB variant is required. Before use, a used SD card could be checked with sudo badblocks -w -s -o error_4gb_sdcard.log /dev/sda.
USB-Stick
Due to space constraints, I have installed a 32GB NanoUSB stick. This is where the photos are stored, allowing the SD card to be operated with overlayFS (=ReadOnly) for extended lifespan.
I handle the mounting using /etc/fstab with the line /dev/sda1 /mnt/nanostick ext4 auto,nofail,sync,users,rw 0 0. I haven't set a UUID so that the USB stick can be swapped without needing reconfiguration.
Thermoprinter
- Typ GPT-4352-LV-88-USB, more informations to the printer here, there are also some datasheets and some hints.
- Operated via CUPS, allowing printing from anywhere within the operating system; theoretically, the printer can also be used as a network printer.
- Following the advice of this tutorial and also from this YouTube video, I purchased the Pollin thermal printer twice.
- Fortunately, the CUPS driver is still available on the manufacturer's website; I've stored the file under MYSTUFF/tutorials, along with the tutorial page saved as HTML.
- I captured the initial photos with this command line:
libcamera-still --width 800 --height 600 -n 1 -t 1 -o - | lp - A micro USB angled plug would be more space-saving for the casing, as the plug from the printer makes the casing longer.
Cameramodul
I am using the first version (V1.3) of the raspberry cameramodul with 5MP. More info for the overlays.
TFT Screen
Description
- I've installed this Chinese component, details can be found in the datasheet.
- It's a 2.2'' SPI TFT module.
- Driver: ILI9341 with a resolution of 240x320 dots, non-touch.
- SKU: MSP2202.
config line for TFT in /boot/config.txt
    hdmi_force_hotplug=1
    hdmi_group=2
    hdmi_mode=87
    hdmi_cvt=320 240 60 1 0 0 0
    dtoverlay=ov5647
    dtoverlay=vc4-fkms-v3d
    max_framebuffers=2
    disable_overscan=1
Wiring TFT to GPIOs
- TFT (blau, VCC) -> Stift 1 (3,3V)
- TFT (lila, GND) -> Stift 6 (GND)
- TFT (grau, CS) -> Stift24 (GPIO8 = CEO)
- TFT (weiss, RST) -> Stift22 (GPIO25) -> also reset_pin=25 in overlay
- TFT (schwa, DC/RS) -> Stift18 (GPIO24) -> also dc_pin=24 in overlay
- TFT (braun, MOSI) -> Stift19 (GPIO10 = MOSI)
- TFT (rot, SCK) -> Stift23 (GPIO11 = SCLK)
- TFT (orange, LED) -> Stift16 (GPIO23) -> also led_pin=23 in overlay
- TFT (MISO) -> nicht angeschlossen
Wiring colors at TFT
- beginnend mit rot = VCC
- lila
- grau
- weiss
- schwarz
- braun
- grün
- orange
Switch and Buttons
Power Button
- Followed this guide.
- One terminal of the button connected to GND, the other to GPIO3.
- Caution: in the file
sudo nano /etc/systemd/logind.conf, uncommentHandlePowerKey = poweroff.
LEDs
- when taking a photo, an LED should flash briefly, maybe 2-3 times.
- a green LED indicates whether the Li-Ion battery is providing power.
- a red LED indicates when the li-ion cells has a critical discharged level
IR Sensor
- Two commonly used sensor types: TSOP4838, VS1838B.
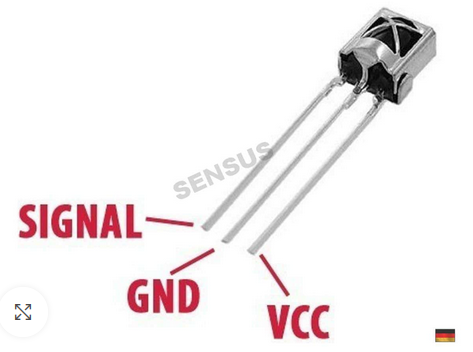
- Guide1, Guide2, KEY designations
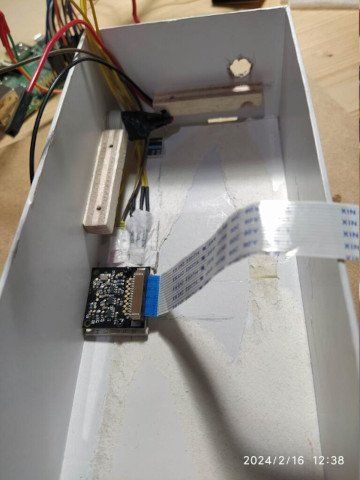
Wiring in the Casing
this wires has labels, because you dont see where they are coming: - Short cable = VCC - Labeled = DATA - Common ground (red LED, trigger button, IR) = GND
Step-Up + Charge Controller
- Ordered Adafruit 2465, got the tip from here.
- Issue is that the part only delivers about 1A, and when the printer charges its own batteries via the USB interface, the Raspi indicates undervoltage. It doesn't crash though.
- This Adafruit 2030 part lacks charging electronics but should deliver up to 2A.
- The whole system only crashes when charging while keeping the camera on. Then, current is diverted for the battery, leaving the Raspi with insufficient power, causing it to reboot repeatedly. Current solution: only charge when shut down.
- To draw the maximum of 1.2A (1,200 mA) from a USB port, you need to enable it in the file "/boot/config.txt" with the line "safe_mode_gpio=4" (old firmware) or "max_usb_current=1" (new firmware) to lift the maximum current draw from 600 mA.
- I power the PI not through the micro-USB interface but directly through PIN2=5V and GND pin, to minimize losses while on the go.
- For the second build i buy this one
Li-Ion cell capacity voltage without a load
| cellvoltage | capacity |
|---|---|
| 4,2 V | 100 % |
| 4,1 V | 90 % |
| 4,0 V | 80 % |
| 3,9 V | 60 % |
| 3,8 V | 40 % |
| 3,7 V | 20 % |
| 3,6 V | 0 % |
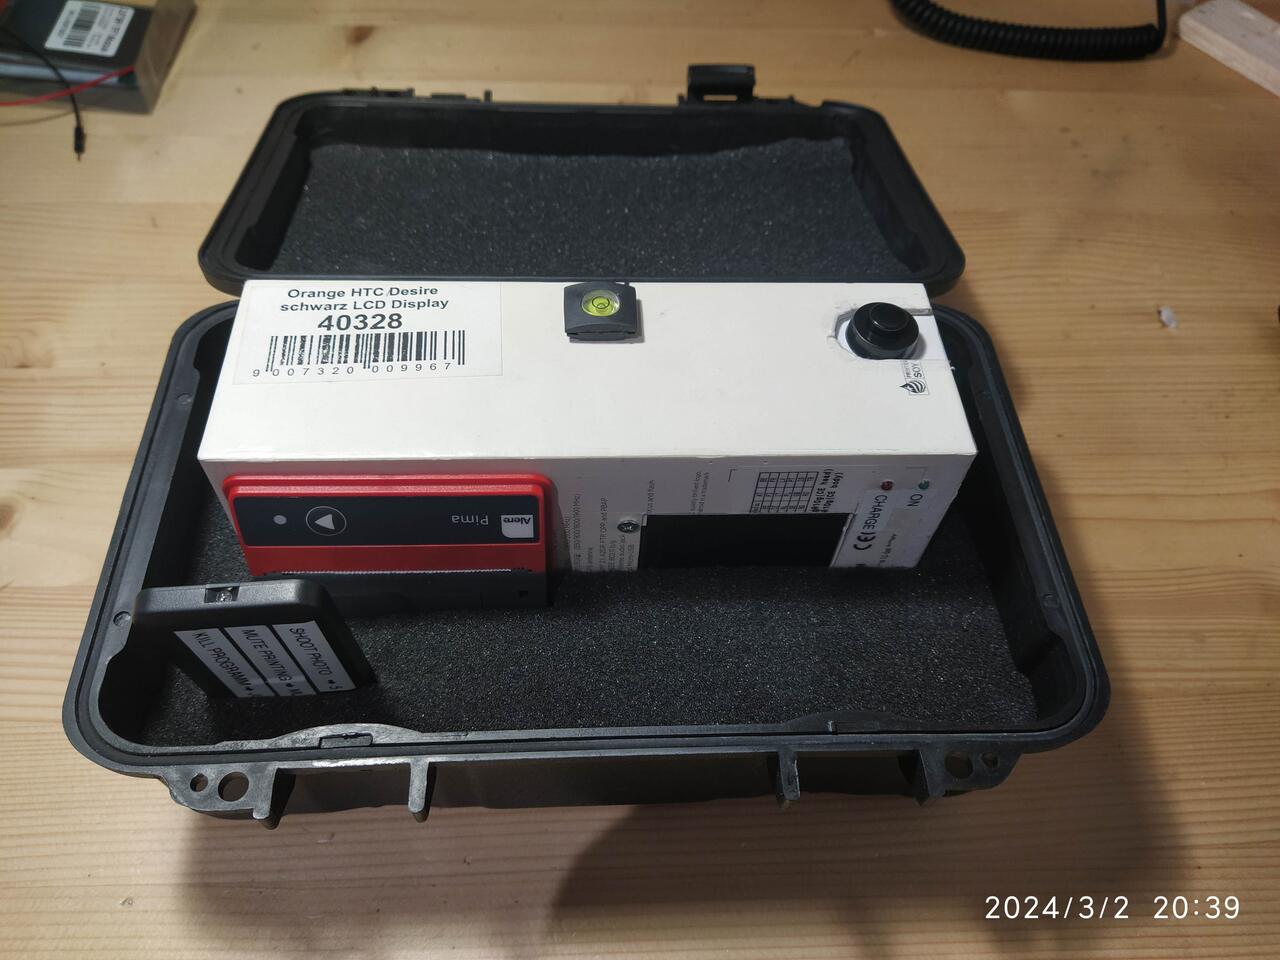
Casing
Everything was housed in an old phone box. Dimensions including protruding components:
- Length: 197mm
- Width: 97mm
- Height: 78mm
- total weight: 537g
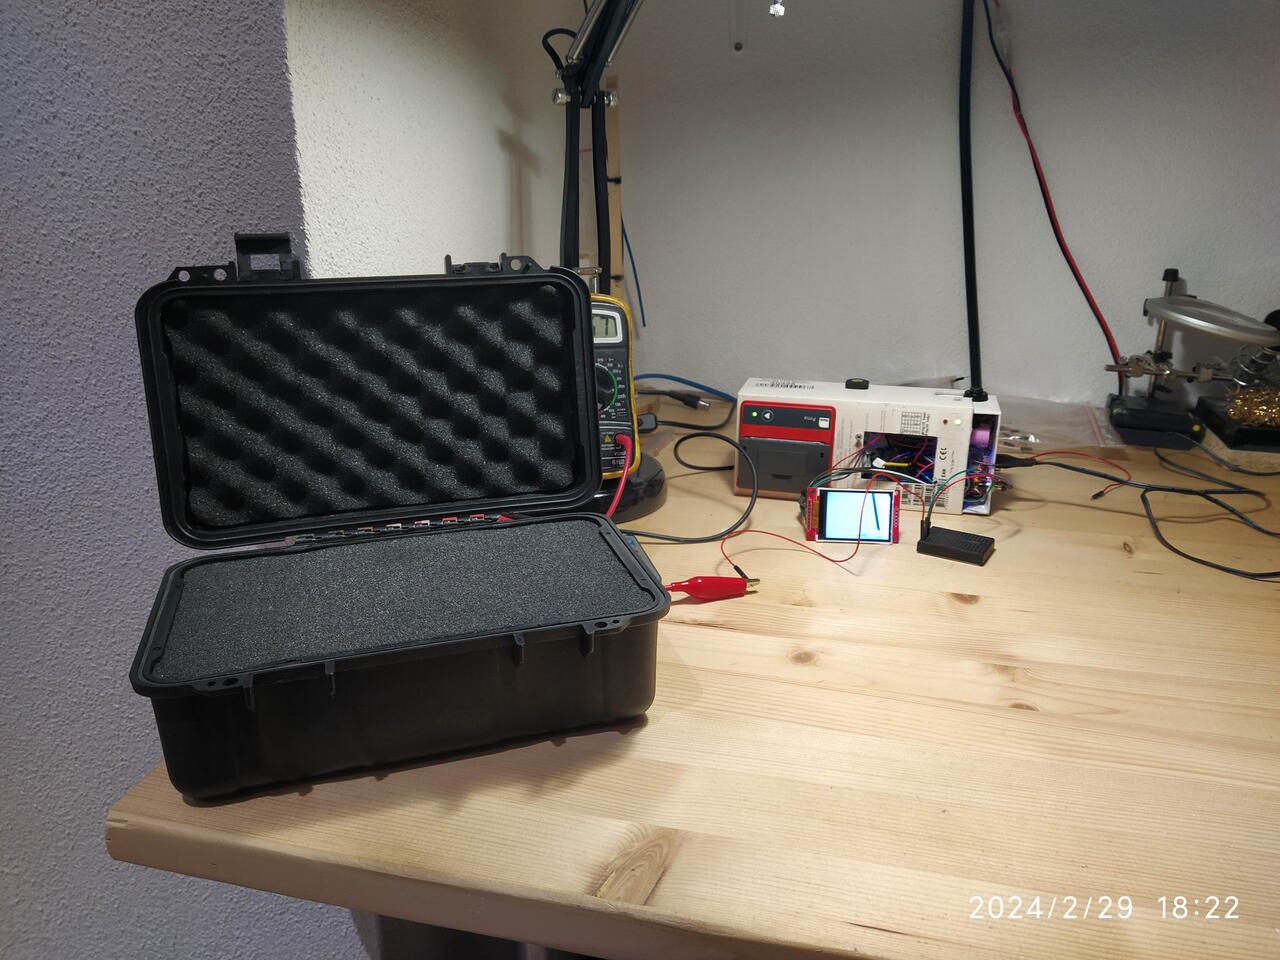
Transport Box
The transport box could additionally accommodate:
- 2x Spare rolls (white + blue)
- Spare SD card (OperatingSystem copy)
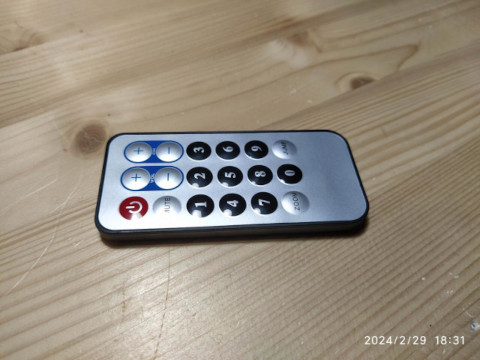
- Remote control
- Micro USB cable for charging
- Mini-cross screwdriver